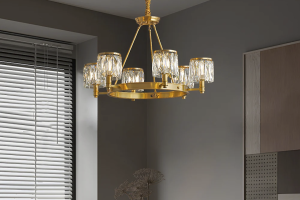
Ceiling lights are an essential part of any room. They not only add brightness but also create a mood and ambiance. If you’re looking to improve your home’s lighting, consider “flushing” your ceiling lights. Flushing involves installing a light fixture that is situated close to the ceiling with no visible gap. This guide will show you how to flush your ceiling lights to create a sleek, modern look.
Step 1: Choose Your Light Fixture
Before you start, choose the right light fixture for your room. Flush mounts and semi-flush mounts are the most common fixtures used for this type of lighting. Flush mounts are completely flush with the ceiling, while semi-flush mounts hang down slightly. Make sure you measure the height of your ceiling before purchasing a fixture to ensure a good fit.
Step 2: Turn Off Power
Before starting any electrical work, turn off the power to the light fixture you will be working on. This can be done by flipping the appropriate breaker in your home’s electrical panel. Double-check to make sure the power is off by using a voltage tester.
Step 3: Remove Old Fixture
Once the power is off, remove the old light fixture by unscrewing the mounting screws and gently pulling the fixture down. Be careful not to touch any wires.
Step 4: Install Mounting Bracket
Attach the mounting bracket that came with your new light fixture to the electrical box in the ceiling using the provided screws. Make sure the bracket is securely attached and level.
Step 5: Connect Wires
Connect the wires from the ceiling to the wires on the light fixture according to the manufacturer’s instructions. Typically, this will involve matching the color-coded wires and twisting them together before securing them with a wire nut.
Step 6: Attach Fixture
Next, attach the fixture base to the mounting bracket using the provided screws or nuts. Make sure the fixture is level and flush with the ceiling.
Step 7: Install Light Bulbs
Finally, install light bulbs in the fixture and turn the power back on to test the new lighting. Choose bulbs that are appropriate for the room’s intended use and remember to turn off the power before changing bulbs in the future.
Tips
– If you’re uncomfortable working with electrical wiring, consider hiring a professional electrician.
– Make sure the light fixture you choose is rated for the wattage of the bulbs you plan to use.
– Consider using LED bulbs for a more energy-efficient and long-lasting lighting solution.
Flushing ceiling lights is a simple and effective way to update the lighting in any room. With the right tools and some basic electrical knowledge, you can easily install a new flush-mounted or semi-flush mounted fixture. Remember to turn off the power and follow the manufacturer’s instructions to ensure a safe and successful installation. Enjoy your newly brightened, updated space!


More Stories
Enhance Your Dining Space with an Acrylic Table Lamp
Enhance Your Living Room with Embedded LED Lights
10 Small Dining Room Lighting Ideas for a Cozy Space